Optical measurement in quality control
 For quality assurance purposes, components are tested before they are used. The measured values obtained must be interpreted and compared with predetermined target values. This often requires complex mathematical calculations. If there is no suitable standard software or you want to have full control of the algorithms used, you need to perform the calculations yourself.
 Example
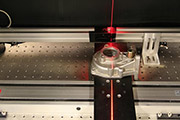
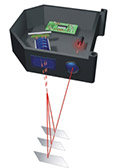
Components of a vehicle exhaust system are measured optically by means of laser triangulation for KÜBLER & ESSIG GmbH. From the measured values obtained, the centre point can then be determined for bodies of arbitrary shapes. Using mathematical methods, the calculations can even be performed on a Siemens S7 device driver.
For further information
LICHT UND BEWEGUNG (LIGHT AND MOVEMENT)
Testing complex components: Light section sensor, 3D image processing
KÜBLER ESSIG Journal 2013 (German) Page 3
INDIVIDUAL MEASURING EQUIPMENT SURPRISINGLY DIFFERENT
Scientific mission
KÜBLER ESSIG Journal 2011 Page 3
ECONOMICAL FOUNDATIONS
Mathematics offer amazing solutions
KÜBLER ESSIG Journal 2010 Page 3
Image sources:
Image 1: © Photonfocus AG
Image 2: © MICRO-EPSILON MESSTECHNIK GmbH & Co. KG


